In Alma, there are different ways to transfer items from one library to another library, each has its own requirements and steps. We will list steps for both method in this article, click the links to each section.
- Method A: Using “Item Transfer” Work Order (same step for one item and batch items)
- Method B: Using “Move Items” Request
Method A: Using “Item Transfer” Work Order
During Alma migration, an “Item Transfer” work order was created for this purpose. Here are the steps:
Steps For staff who initiate the item transfer:
- Sign into Alma, switch to “Resource – Item Transfer” department/location.

- Use “Fulfillment” > “Scan In Items” tool, click “Change Item Information” tab.
- Set the Change Type to “Permanent”, then select the destination library as the “New Library” and choose correct “Location” for the item.
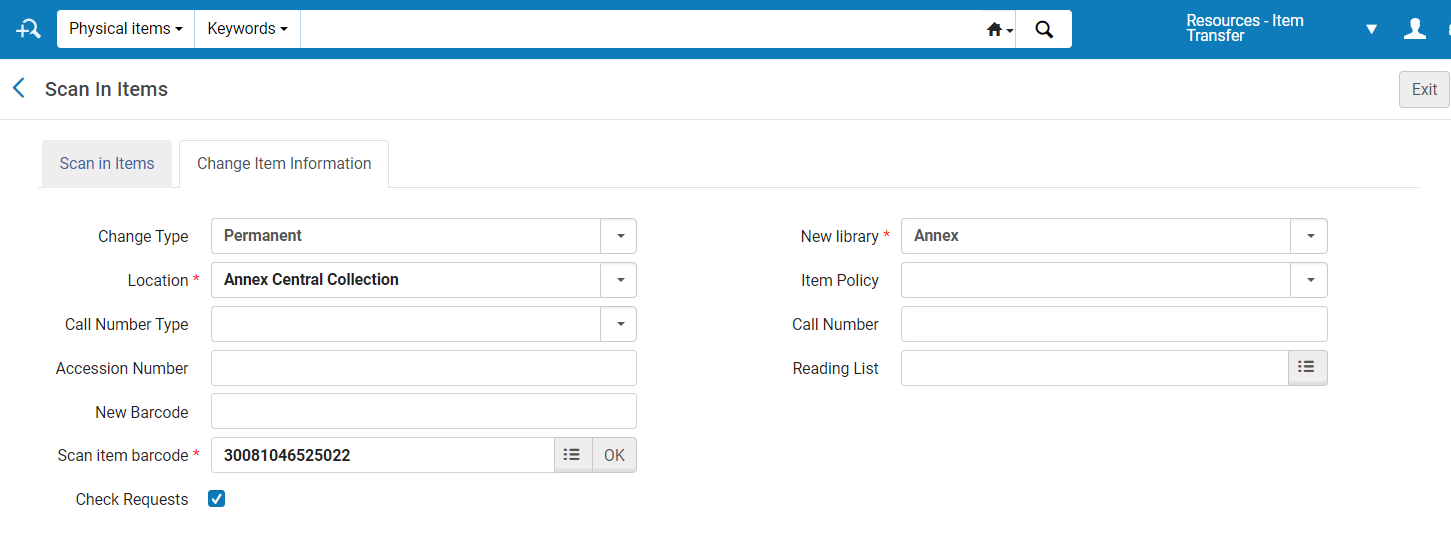
- Click “OK” to finish this step. Keep scanning additional item barcodes, scanned items will be displayed at the bottom of the “Scan in items” page.

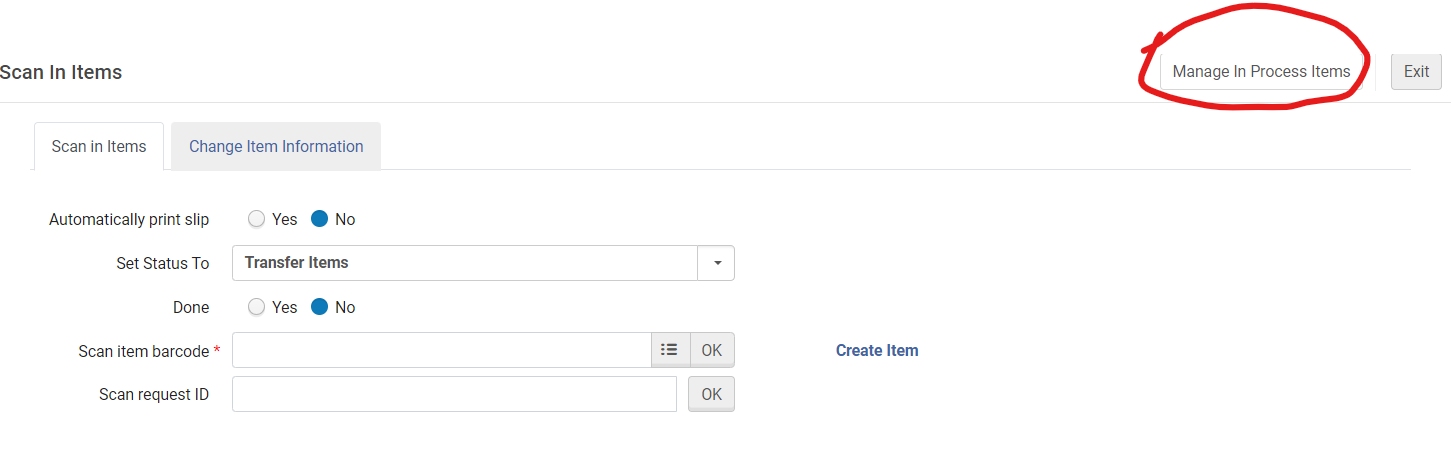
- When you done scanning, go back to “Scan In Items” tab, click “Manage In Process Items” button on the top to see a list of “In Process items”.
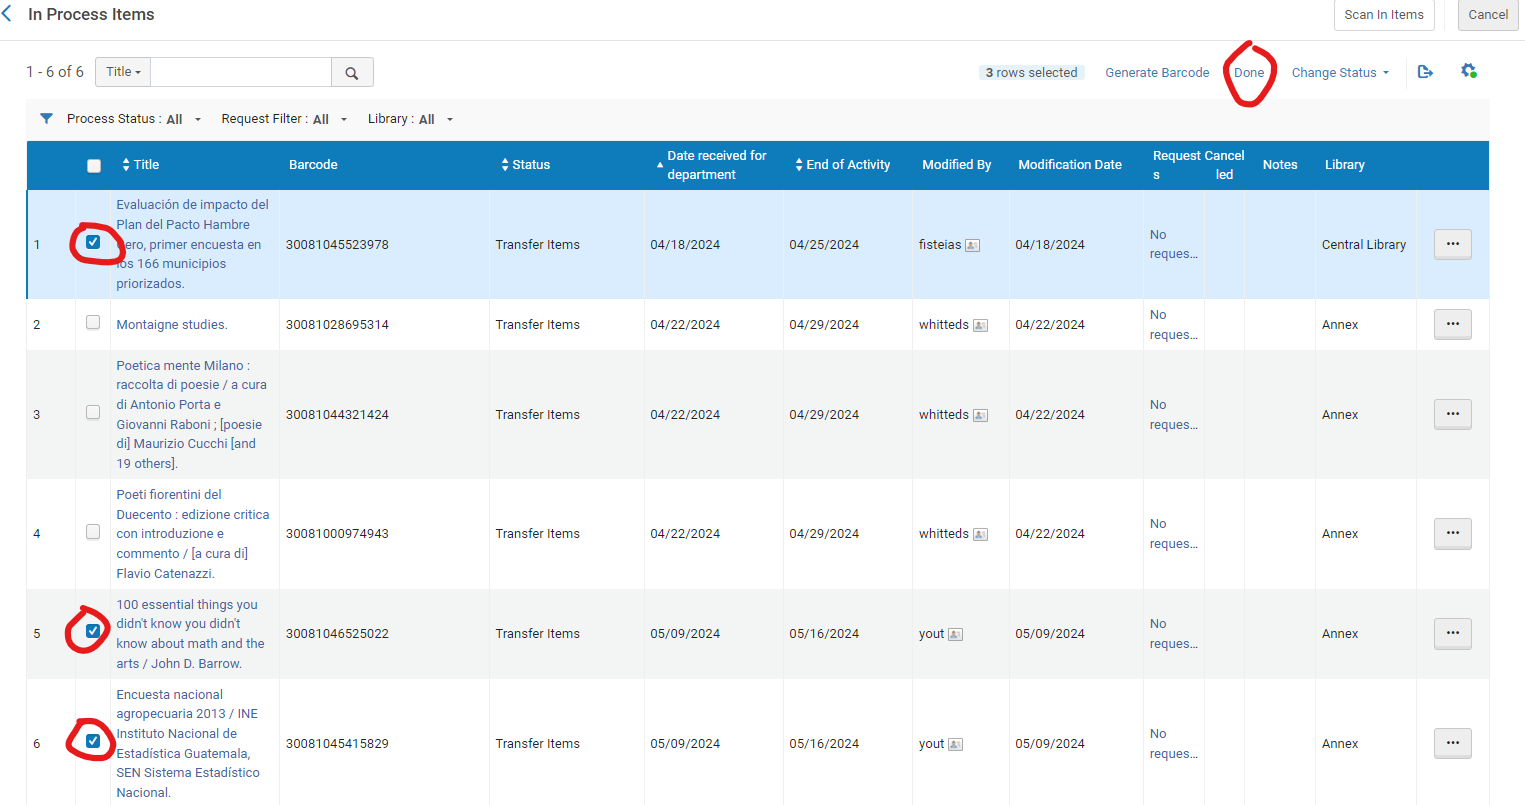
- Select or choose all items you just scanned in, click “Done” button on the top, this step will change the work order status to “Done”.
- Now you’ve completed the needed steps in Alma for those items, put items on the book truck and deliver them to the Destination library.
Steps for staff receiving the transferred items:
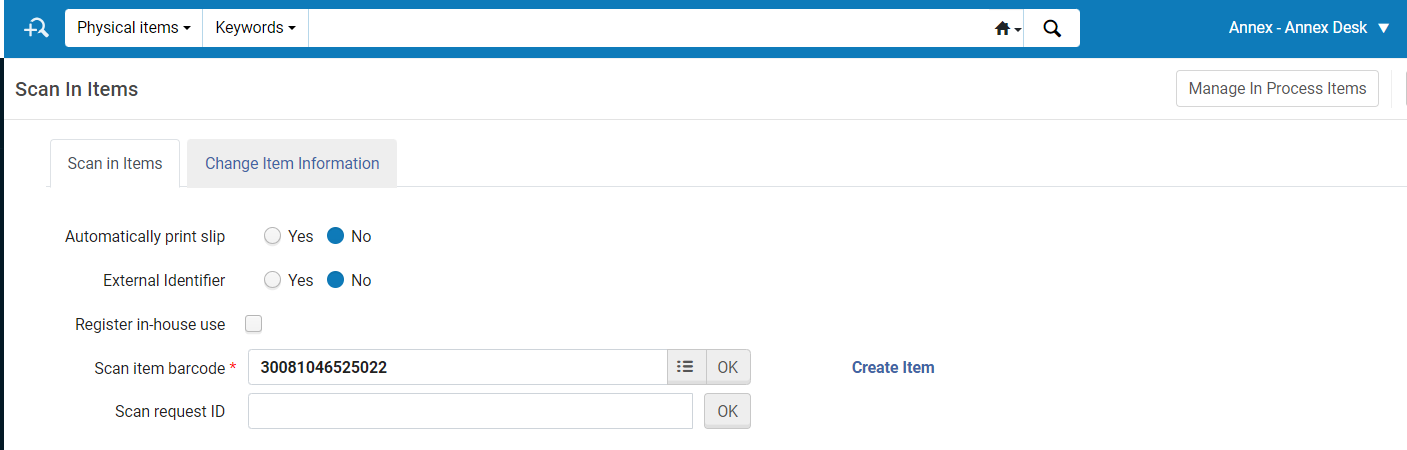
- Sign into Alma, make sure they are in their regular “department/location”.
- Use “Fulfillment” > “Scan in Items” tool, scan item barcode.Alma system will prompt staff to reshelve the item to its destination location.
Special Notes:
Throughout the years, there were issues using this procedure, especially for staff who initiate the item transfers.
- Staff need to be assigned as an operator for Transfer work order.
- Staff need to switch to “Resource – Item Transfer” department when scanning items.
- Each item requires two steps, one scan into the Transfer work order; one set the transfer work order status to “Done”.
If those steps are not strictly followed, it will cause issues for receiving staff, such as:
- If the Transfer work order status is not marked as “Done”, when receiving staff scan in item, system will prompt to transferring the item to “Resource – Item Transfer” department.
Method B: Using “Move Item” Request
Alma has a build in “Move Item” request, which we can use to initiate and track item transfer among different libraries. The steps are as follows:
Move single item to a different library:
- No special roles or access rights needed.
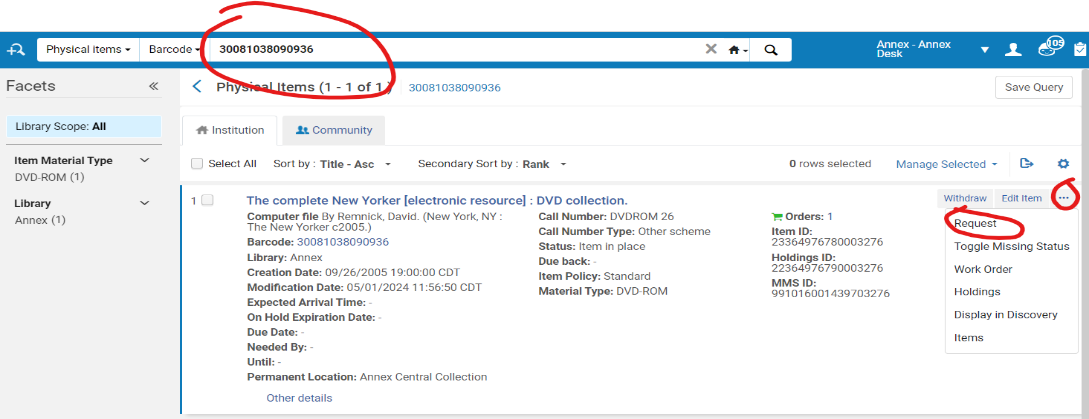
- Sign into Alma, scan item barcode in Alma search bar to locate the item.
- Click the “Action” button, choose “Request” from the drop-down menu.
- In the next screen, choose “Move Permanently” in Request type, choose the library and location for where the item will be transferred to.
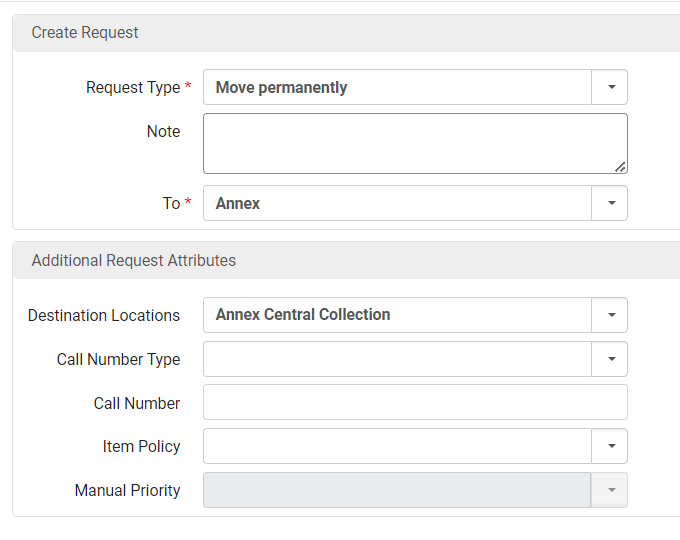
- Click “Submit” to complete the operation in Alma. Put the physical items on the truck, deliver to Desitination library.
For staff receiving the item, the steps are the same as the other method.
- Sign into Alma, make sure they are in their regular “department/location”.
- Use “Fulfillment” > “Scan in Items” tool scan item barcode, then reshelve the item to its destination location.
Move batch items to a different library
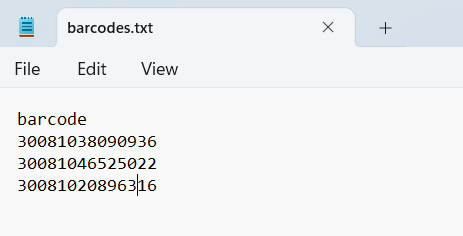
- With a batch of items in hand, open a notepad file or an Excel spreadsheet. Scan item barcodes into the Notepad or Excel file, make sure the first line is labelled as “Barcode”, save the file.
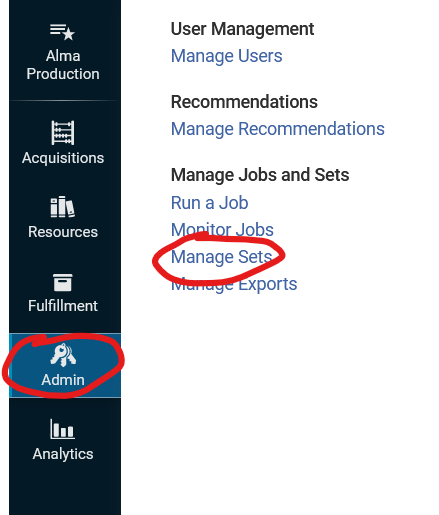
- Create a set in Alma.
- Use “Admin” > “Manage Sets” tool.
- Click “Create Itemized Set”, fill in the set details, choose “from File” to add items to Set, upload the newly created file to the tool.
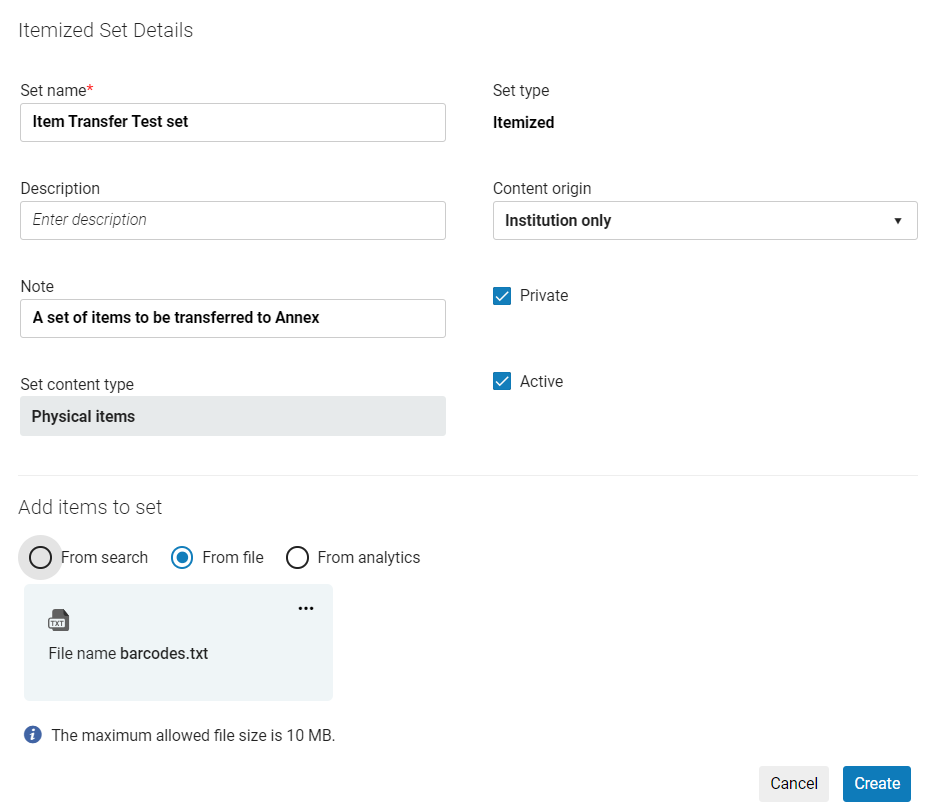
- Click “Create” button to create the set.
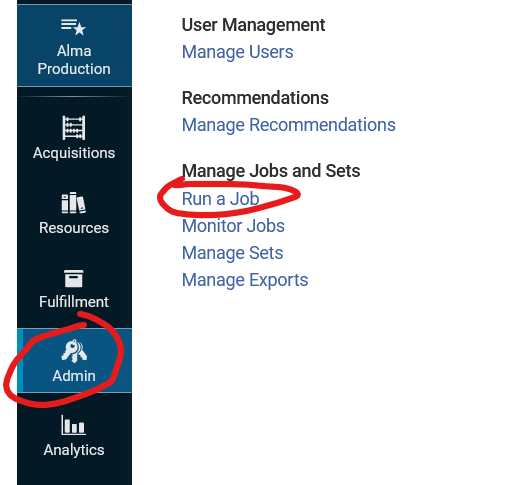
- Use “Admin” > “Manage Sets” tool.
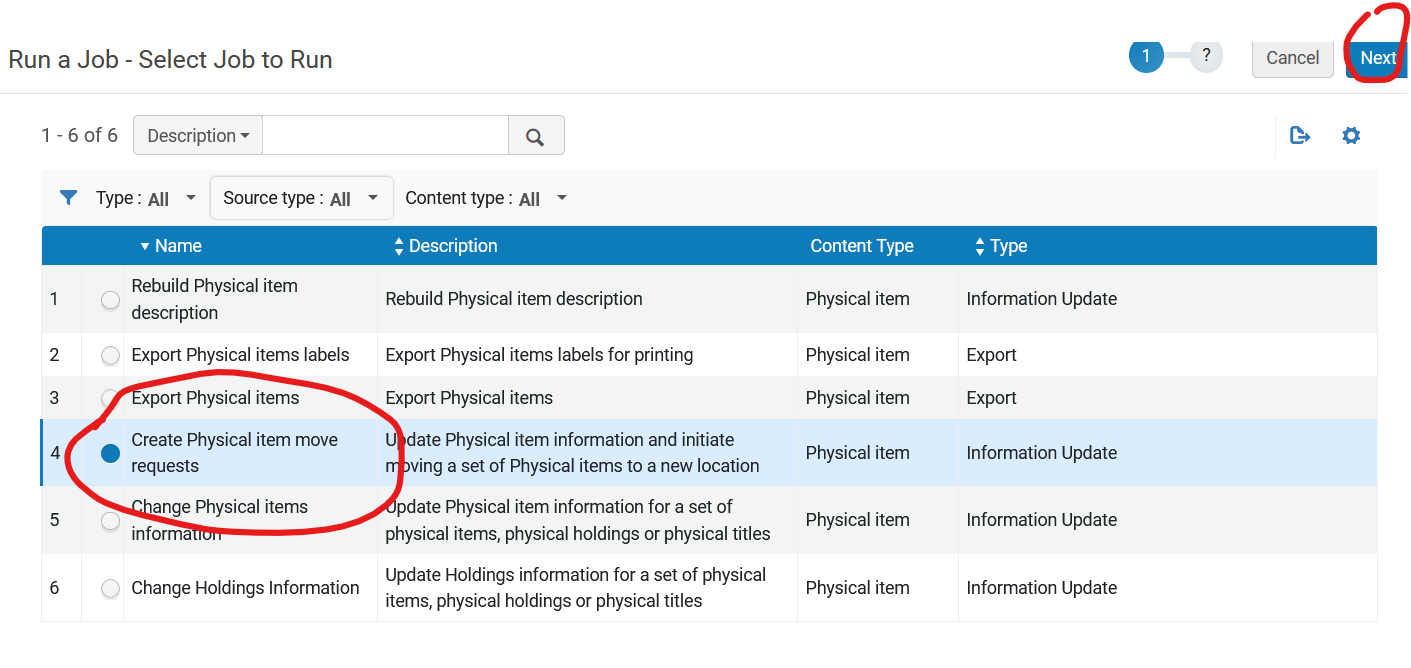
- Run “Create Physical Item Move Requests” job. (Based on your role, you may see different jobs, most students and staff have access to “Create Physical Item Move Requests” job. )
- Use “Admin” > “Run a Job” tool
- Click “Create Physical Item Move requests”, then “Next” button.
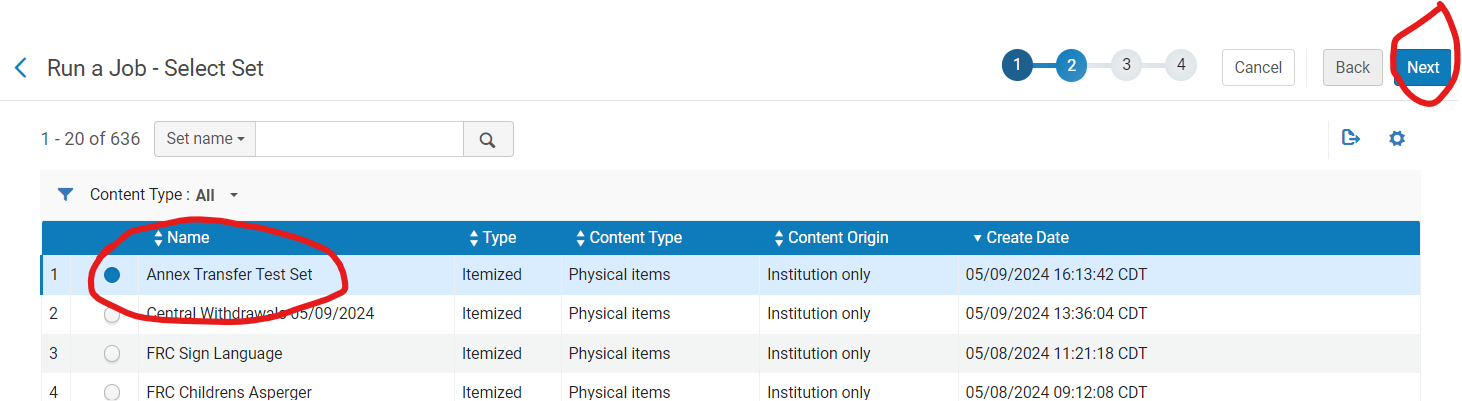
- Choose the set you just created, click “Next” button.
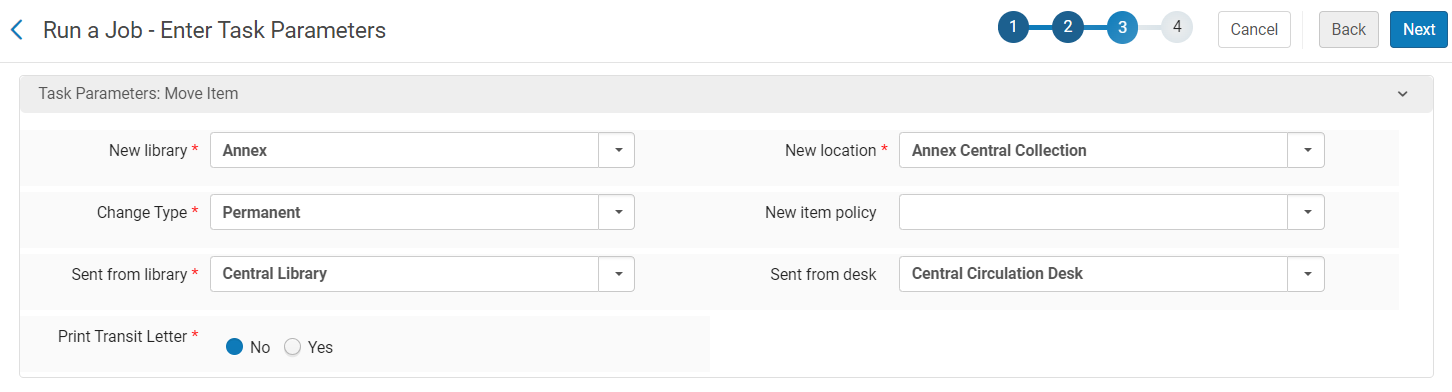
- Set the destination library and location,set change type to “Permanent”, set sent from library and location, click “Next”.
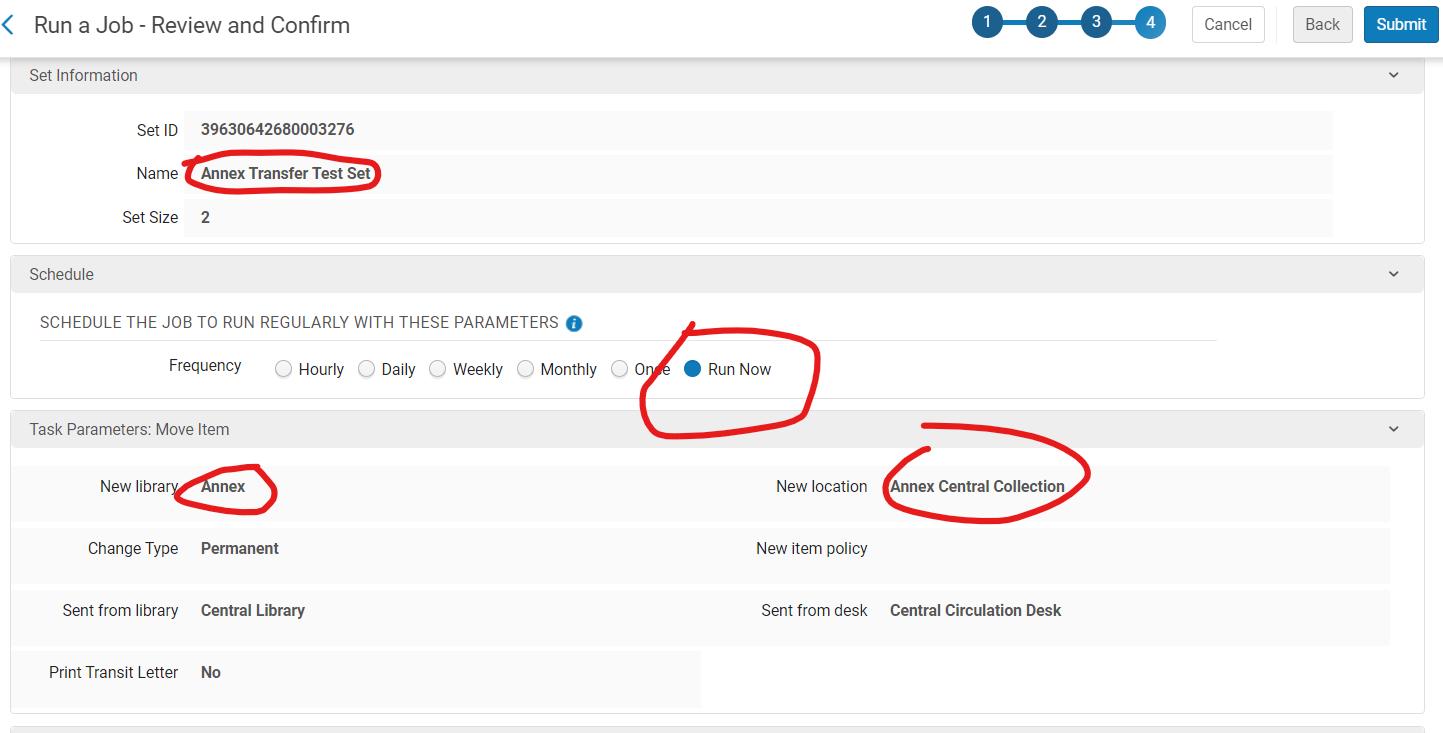
- Review and confirm all the information looks right, schedule time to run, click “Submit”.
- Use “Admin” > “Run a Job” tool
- Now you’ve completed the needed steps in Alma for those items, put items on the book truck and deliver them to the Destination library.